Our 2011 Spring Commissioning had some dramatic results. We're excited to be back in the water after having had our drive train partially overhauled. While that's a big success, there's always more.
We thought we might be getting some paint. But on inspection our bottom paint was perfect. So we cleaned the marine life off the propellor. There was a tiny bit of play in the shaft. This indicates problems with the cutless bearing. Something we should "consider" replacing. "Consider" they all said.
Turns out the drive shaft was was shot because the cutless bearing failed to be cutless. Consequently, we're launching with a new shaft, new cutless bearing and new PYI dripless shaft seal.
We also had two holes patched. That's two fewer places to do maintenance on through-hull fittings. Two fewer places for galvanic corrosion.
We're also starting work on the forward water tank. We tore the lid off (really) and used aquarium adhesive to attempt to patch the holes. We still have to put water in and see if it leaks. If that doesn't hold, we'll have to buy some fancy potable-water paint. The Afters pictures will have to wait until this is actually finished.
That's not all. It never is.
Electrical Repairs
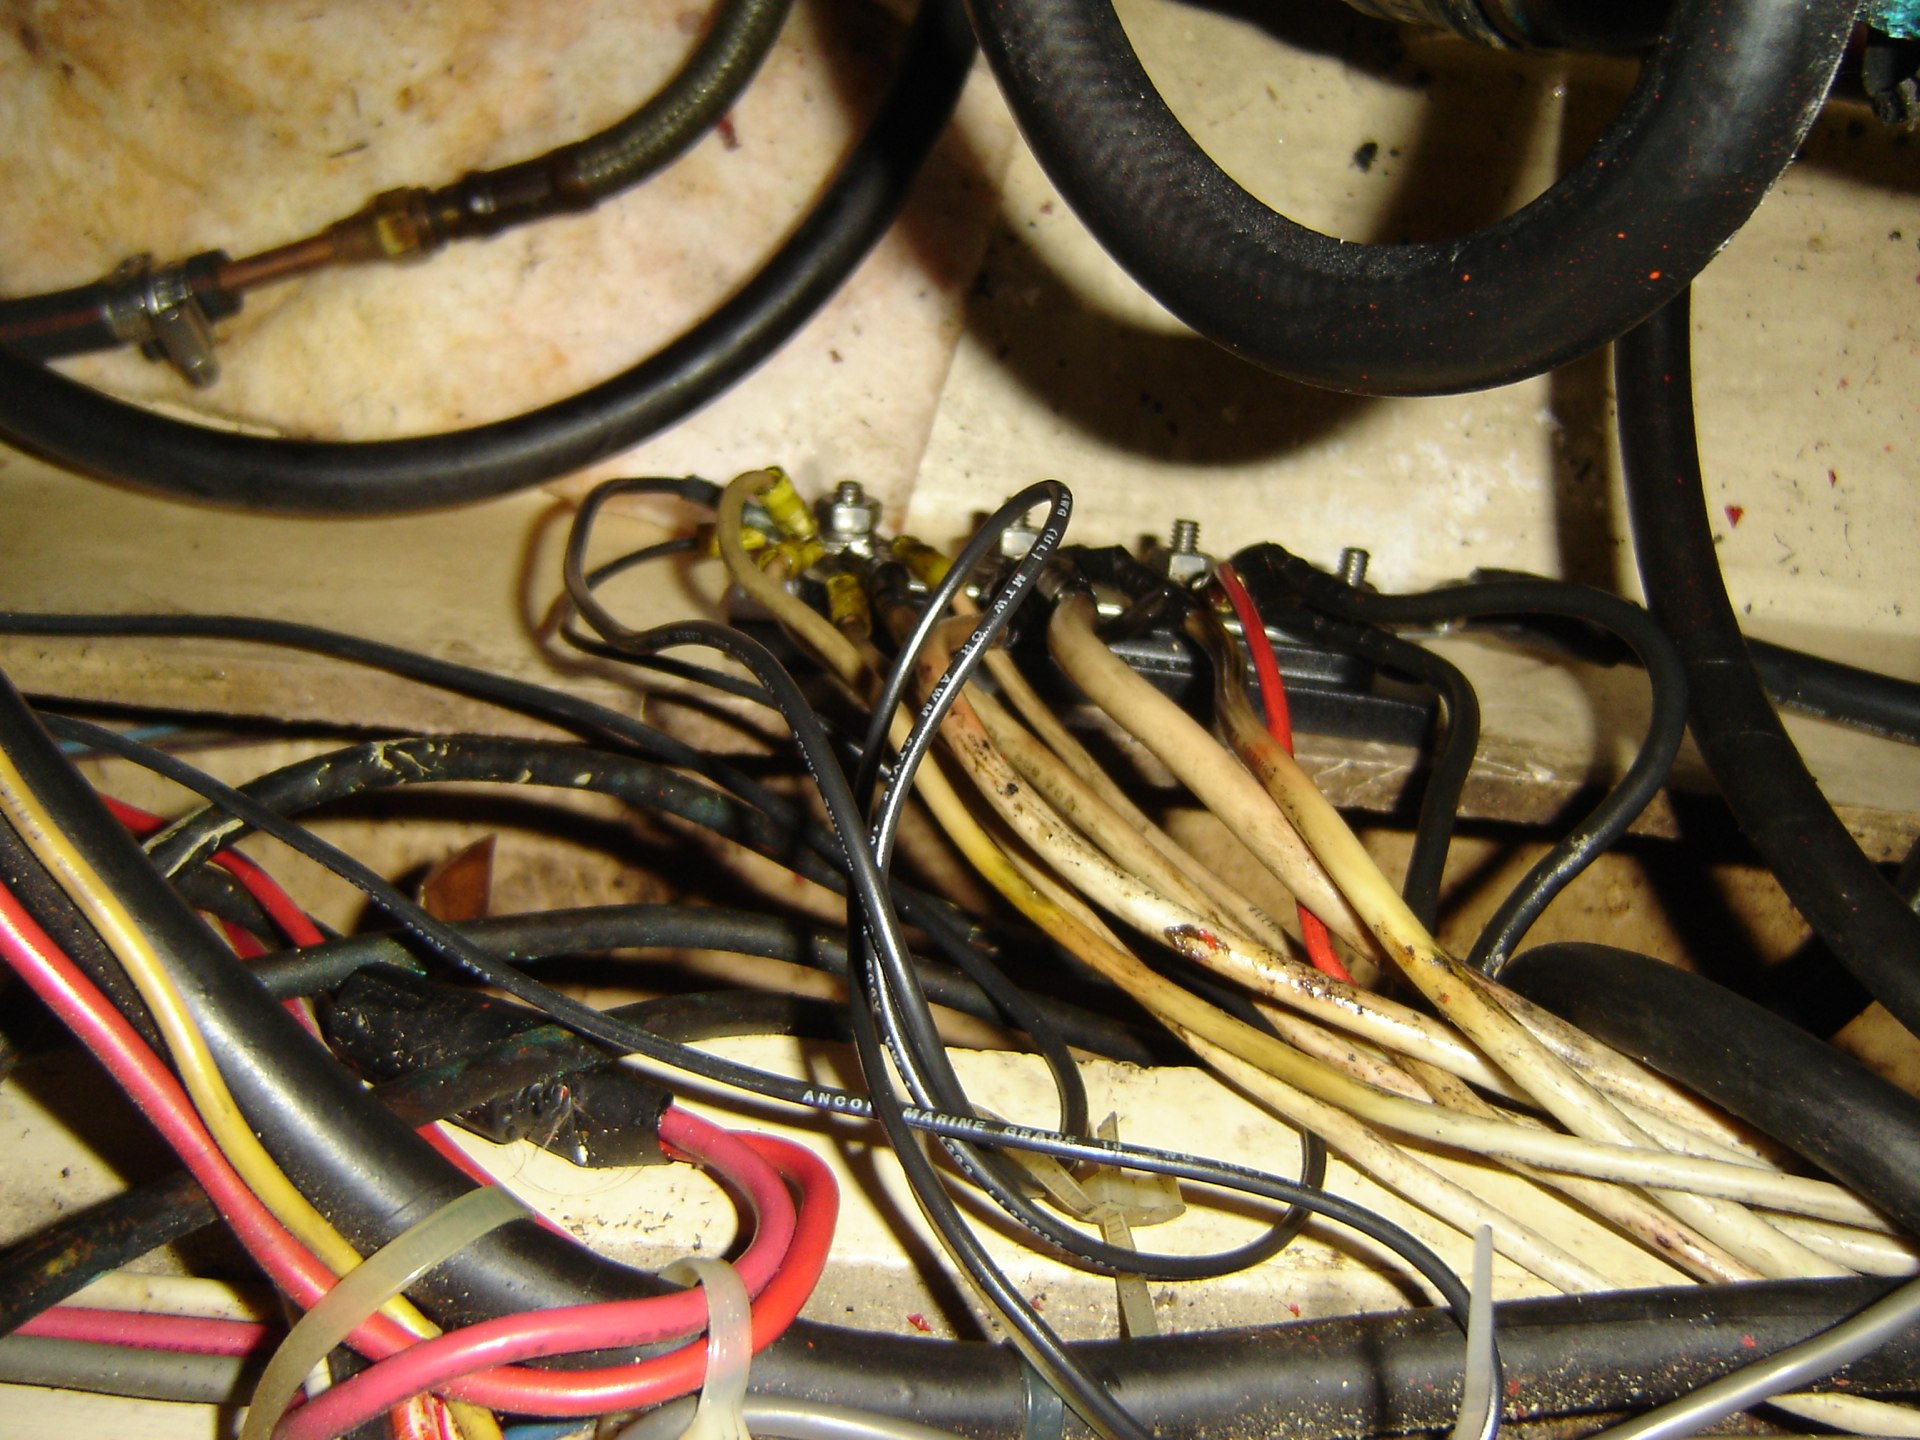
Our project manager sent us the pictures on the right. That's a dozen or so wires smashed onto a single grounding stud on the engine block. It's can be electrically inefficient. Each layer of the stack of connectors is a small space into which dirt, oil and other non-conducting crud can insinuate itself. He said that we should "consider" redoing it.
On the left are a couple of pictures of the engine stud with just the two huge (#1 AWG) battery negative cables and a third huge jumper wire to a grounding bus bar. Yes, those wires are ½" in diameter. Yes, they're hard to bend.
Adding a bus bar allows me to break up the various connectors into smaller, cleaner, better connected groups. Ideally, I can redo each individual lug and replace the tape with shrink-wrap.
Deck "Before"
We've uncovered a more serious problem associated with the large Hole in the aft cabin coach roof. The cork that we used to keep the snow and rain out was damp when I looked at it. There was water under the deck. Uh-oh.
I drilled a number of holes under the big hole to allow any moisture to weep out. A shocking amount of water dribbled out.
Okay. There's a lot of moisture under the deck. According to Don Casey—and others like Practical Sailor—one way to repair this kind of laminate is to do the following:
-
Let the moisture evaporate. I drilled a grid of holes. Casey suggests that it will take months for the water to evaporate out of the wood. That'll be easy. We'll go sailing and ignore it. We can tape a plastic bag over it loosely to keep the rain out.
-
Use acetone to help the water evaporate. Really.
-
Prepare a solvent plus epoxy mixture like CPES or Git Rot. The solvent causes these mixtures to wick into wood and harden there. We'll inject the epoxy into the various holes so that it soaks into the voids in the wood.
-
Fill the surface holes with gelcoat or Marine Tex. Maybe sand smooth and paint. Maybe leave well-enough alone, since the Marine Tex white is a pretty close match to the existing color.
-
Patch the big hole on the inside. This may be done with a big teak bung. Or it may require a small patch that simply lays on top of the wood.
We won't see the "after" on this for months and months.