

Made slow progress on two jobs: chainplates and raw water pump.
Chainplates have been inspected. We're still working on putting everything back in place. And working out the next steps.
The raw water pump is in place, too. We still need to test it. That requires time and a certain amount of courage. Hopefully Mr. Lehman is happy. He is irascible.
Having a lot of fun visiting with the various other boats at the marina: Serenade, Skimmer, Baloo, Matu, Liquid Therapy, Fortuna and Kachina. Yep. Bunches of people on a bunch of boats.
Saturday night: Jumbo Lump Daddy and the Backfin Boys. Always a fun time. Biggest hits of the 60's and 70's. Maybe something from the 80's, but it's rare.
Chainplates
Each chainplate that we pulled was beautiful. Wonderfully clean-looking steel.
They're (almost) all measured and traced. One got skipped so we'll use the other side of the boat for a template. Two pairs are total duplicates, so we only traced one of those pairs.
We eventually learned what needs to be done, rigging-wise, to be successful.
Two weeks ago, when we started this, we learned about slacking the headstay before we can release pressure on the backstay. Since that was the first set of chainplates we looked at, that made the task seem impossibly daunting.
This week we learned that the uppermost shrouds need to be slacked as a pair. Slacking one of the top shrouds merely twists the mast, not quite allowing the mast to stand up straight, and not releasing much pressure on the shroud. Slacking both top shrouds eases the slight bend out of the mast, allowing the clevis pins to be removed.
We've also learned, interior furniture-wise, what we want.
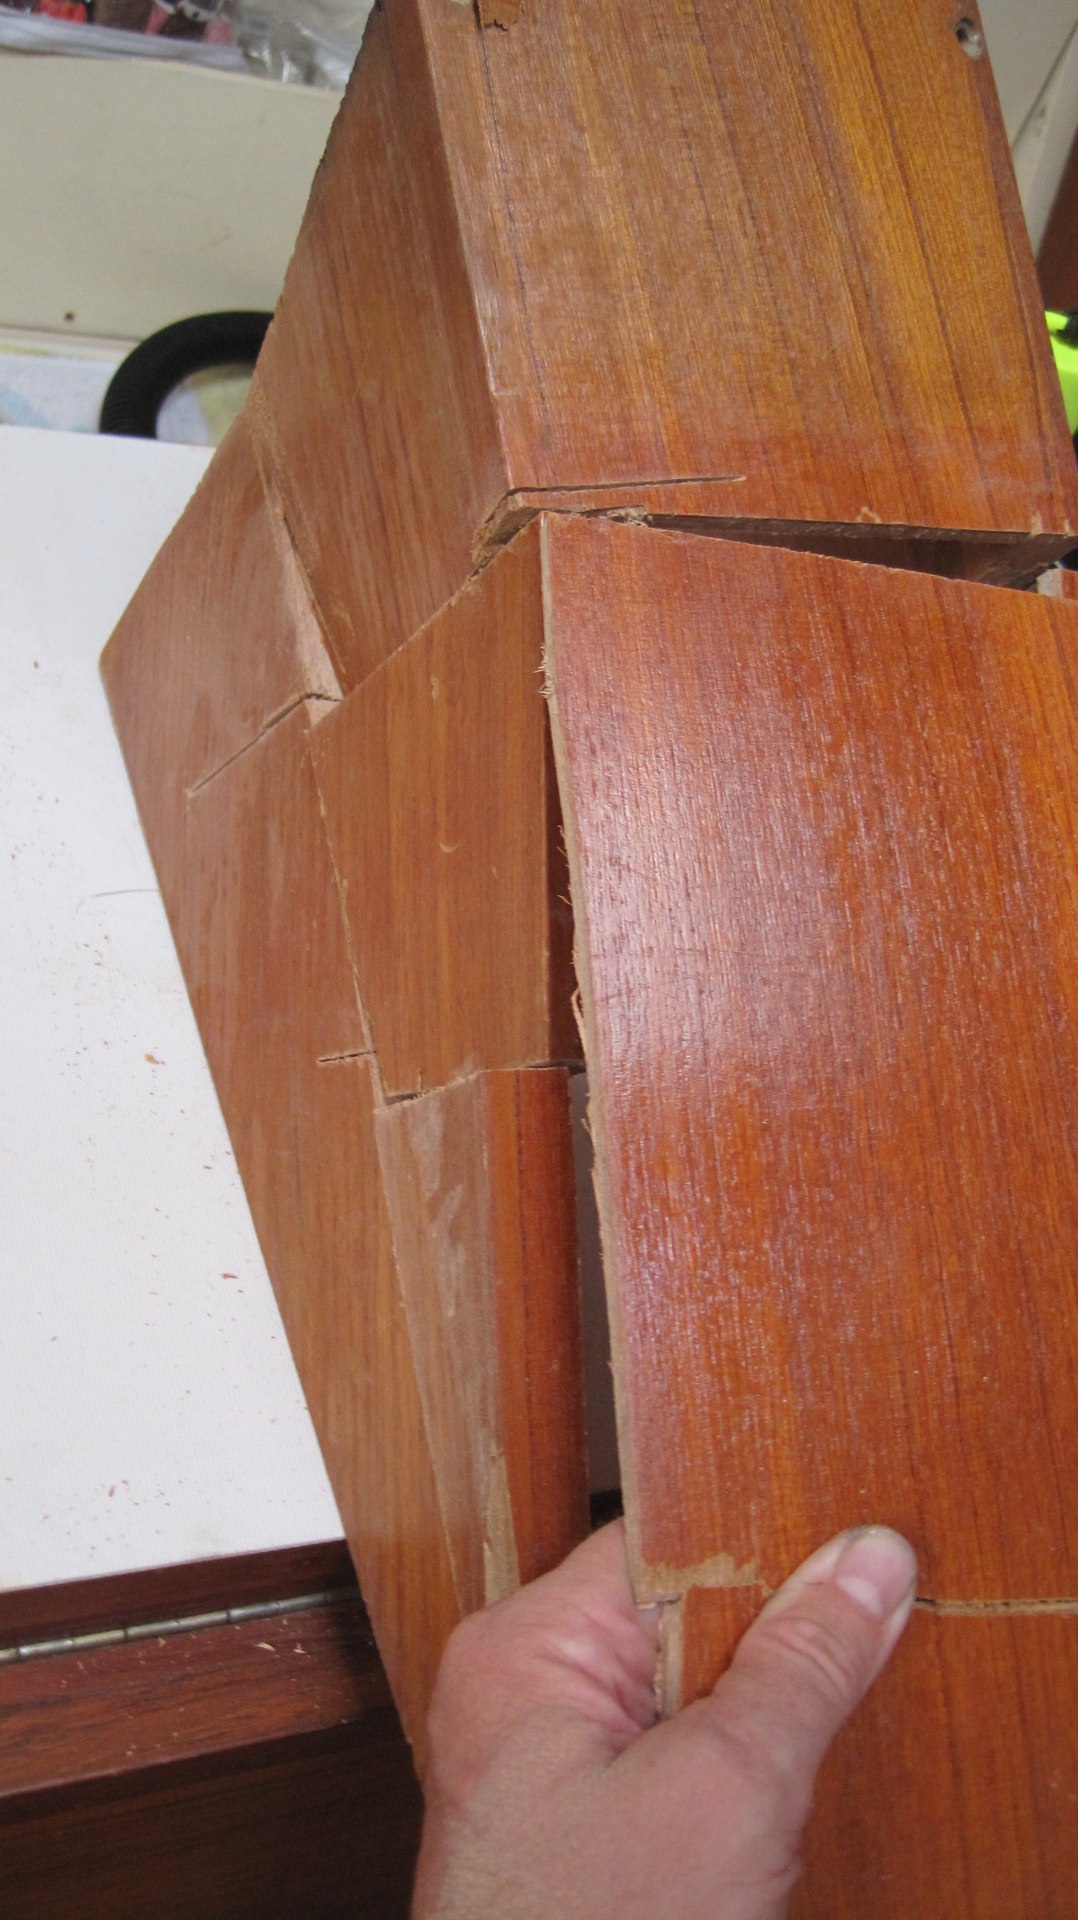
We're re-arranging the woodwork to make chainplate inspection and replacement possible in the future. That means that we've "removed" (butchered) the decorative boxes and created some expanded finger holes. CA's getting much better at using Fein Multimaster to make tricky cuts.
The reason she's doing the sawing is clear once you've seen her work. I had drawn a 2½″ deep box around two of the 2½″ bolts, showing how big a space was required for me to extract them. She eyeballed it for a moment, tapped the wood and stuck the saw blade in about 2¾″ or maybe 3″ from the chainplate.

"Um," I shouted over the saw, "that's not the line I drew."
"Right," she said, "but that's where the supporting framework is."
The blade plunged easily through the ¼″ plywood at the back of the shelf. After two more cuts, she had a window through the plywood that showed two 1″×1″ supports for the back of the cabinet.
"Ah," I said. I wasn't really aware of how the cabinets worked. Wood is not my thing. I'm more of an electricity and plumbing kind of guy.

"Put some screws in above and below the cuts to hold it solidly," she said. After a few long minutes of plunge cutting, the two supports dropped away. Now we have easy access to the bolts.
She has designed pleated fabric boxes to replace the woodwork with something much more removable. The fabric boxes will also be a little better looking because it will break up the long stretch of wood with a fabric highlight here and there. They'll be held on with snaps so we can inspect for leaks.
Finally, we've scanned almost all of the plates and created an image that we can, in principle, use to have new ones made. Note the ruler discontinuity in the picture. I used a panorama application to switch the images together, and put control points only on the chainplate, assuring the chainplate stayed square and accurate.
The ruler? Not so much. It's just reference anyway.
The next step is to get high-quality CAD drawings made. Then, we can have plates made.
It might be slightly simpler to dock at a boatyard that has a good machine shop and have the shop clone each plate as we pull it. That would eliminate the need for drawings and the associated small errors that creep in during that process. But scheduling that kind of work is difficult. What machine shop has time to fit in your random chainplate-pulling schedule?
The Butchered Teak
For what it's worth, this is what the big port-side box was reduced to. There are perhaps nine distinct pieces. The Fein cuts are pretty narrow. A little wood glue and some teak dust and we'd be able to rebuild it.
Not!
It will be replaced with fabric.
Raw Water Pump

Mr. Lehman started spraying saltwater somewhere on our Northbound leg.
The raw water pump pulls seawater into the cooling system from the sea chest.
The green patina is from saltwater corroding the outside of the pump's bronze housing. And also corroding the brass fitting to the left, which is one of the oil lines for the external oil cooler.
Liquid Therapy took us up to Kilmarnock to buy a new one from American Diesel. It's helpful to review the installation with the knowledgable folks there in person. Over the phone doesn't allow quite enough pointing at the important parts.

The new pump is, of course, entirely unlike the old pump. It's smaller, and has a different arrangement of input and output ports. So, there has to be some hose-routing magic to making it fit.
I think I'm supposed to move the oil cooler back. But it collides with the transmission housing, so I'm not sure how well that will work.
Also, it will right difficult to change the oil in the injector pump since the new water pump is in the way.
I may be able to rig some kind of pan made of tin-foil to direct the oil into a mason jar. Or. I may just spread out a big-old oil-absorbing diaper next time I need to change it.

BTW.
The old pump leaked water. Clearly an impeller-side seal had failed. It sprayed raw water from the slot between the impeller and bearing. Here are the internals. There are two washers that I suspect are related to the leak. The wrinkled O-ring doesn't count, that got nicked during the disassembly process.The pump came apart pretty neatly with some aggressive pounding, but not too much.
The failed seals and washers add up to about $100 to refurbish the pump. We're going to bag the parts and save it as a possible rebuild. It's a $400 pump, so we hate to throw it all into the metal recycling.
This Week
Engine Hours: 0. Diesel Gallons: 0. Miles Run: 0.
Read Aloud: Mistborn Trilogy.
Travel
| Attribute | Value |
|---|---|
| Engine | 0. h |
| Diesel | 0. gal |
| Distance | 0. nm |

