

CA continues to work.
I continue to do some tasks around the boat. I've graduated from small tasks to the significant summer-time chore: removing and inspecting all 16 chainplates. Some of this requires skilled carpentry: disassembling and reassembling fine teak furniture.
We were told by some old salts that the key to being live-aboard boaters is to get one job done before noon each day. A shower counts.
Forward Water Tank
We stuffed a 26 gallon bladder into the old forward water tank. It's a Plastimo tank that measures 27.5″×41.5″. Full, it's about 11″ tall. Vetus and Plastimo make some triangular tanks that are about 46″×60″ or 41″×45″; they're too wide for the under-the-V-berth location.
The bladder fit through the inspection port with no difficulty. We were able to connect the existing inspection plate fill and pickup fittings to the bladder. The fill is 1¼″ elbow threaded into the inspection plate; a 1¼″ to 1½″ bushing brought this up to the diameter of the bladder's hose. A hose barb and 18″ of 1½″ hose was all we needed for the input. The bladder's drain is ½″; Red Ranger's ¼″ pickup inserts inside ½″ hose and seals with a hose clamp.
That allowed us to put the inspection plate back on, leaving a tidy installation with minimal effort at removing the original tank.
At some point, we should cut the old aluminum out of there. We would gain a few more inches of space and we can get the bladder to lay flatter. Really, who wants to take a Sawzall to their boat?
We're going to try similar things for the other two tanks. With luck, a Vetus 58-gallon bladder will fit into each of the large tanks. This cuts us down from nearly 200 gallons of pretty good water to 140 gallons of truly excellent water.
Also, the old tanks may hold 100 gallons (more or less) but the pickup tube's location meant that we only really got 80 or so usable gallons of volume from each tank. When we cleaned the tanks we had to pump something like 20 gallons out of each "empty" tank before they were actually empty enough to wash.
This change will require taking a Sawzall to the boat. Since the tops are not completely accessible, we have to cut the old tanks out in pieces. Sigh. And since we're not 100% sure we can cram the big 58-gallon Vetus bladder in there, we have to choose wisely which tank we attack first. We may be keeping the other one in service while we figure out what works and what doesn't.
Snubber

I redid the anchor snubber (again.) This is a highly-stressed part of the rig, so there's no problem with redoing and redoing it each time it falls apart.
The previous edition had lasted almost 4 years. The line finally chafed through and parted in Norfolk. It lacked a proper thimble inside the eye splice to reduce chafe.
I think I did a pretty good job of creating a fair, smooth splice. I'm tempted to try again to create an even smoother eye splice.
This edition is ½″ nylon line. The breaking strain is listed at 7500 pounds. This should handle the loads up to Beaufort force 11 before it fails. See The Complete Anchoring Handbook for more information on force, breaking strain and related information.
Cleaning our Dink
We left Scout in the water for about 6 weeks in St. Augustine. A mistake.
We left Scout in the water for about 5 weeks in Annapolis. Another mistake.
The algae washes away pretty quickly without too much scrubbing.
The barnacles, however, are another story entirely.
Brooke from Liquid Therapy suggested that I take a block of two-by-four and use this to scrape the barnacles off the Hypalon fabric of the dinghy bottom. The barnacles and the barnacle detritus sanded the wood block down to a nice, smooth finish.

After that, we still had a deep brown residue on the fabric. It's hard to "stain" Hypalon, since it's relatively inert. But there was a residue that was not coming off with intermittent rain water rinsing and solar bleaching.
A little research revealed that every cleaning agent and solvent known to mankind has been used on Hypalon fabric. Comet™ kitchen cleanser, SoftScrub™ bathroom cleanser, On and Off™, Simple Green™, Xylene, Toluene to name a few.
Abrasives seem like an unwise idea to me. It's just fabric. Solvents, also, seem a bit harsh.
So we're down to products like On and Off and Simple Green.
We don't have any On and Off. But we did buy a few ounces of what appears to be Simple Green when we bought the boat. Since it's a degreaser, its good for cleaning the engine room, and some folks use it as a diesel dispersant when they spill fuel.
It also tore into the brown residue on the dinghy.
Greg from Serenade noted that, Simple Green will dissolve wax and can damage your gelcoat. It needs to be used judiciously. I think I'll take the hose and wash the deck again today to assure that there's no Simple Green residue on our topsides.
Chainplate Adventures I: Backstay
Advice from other owners is that stainless steel chainplates have a finite service life and our 80's-vintage boats have exceeded their limit. Other old salts suggest—absent any visible rust—they things are really quite durable.
The advice from all quarters is to examine them carefully, particularly the part that passes through the deck. Some say that they should all be replaced irrespective of signs of wear. Other say that—absent any visible rust—they can be left in place and inspected every year.
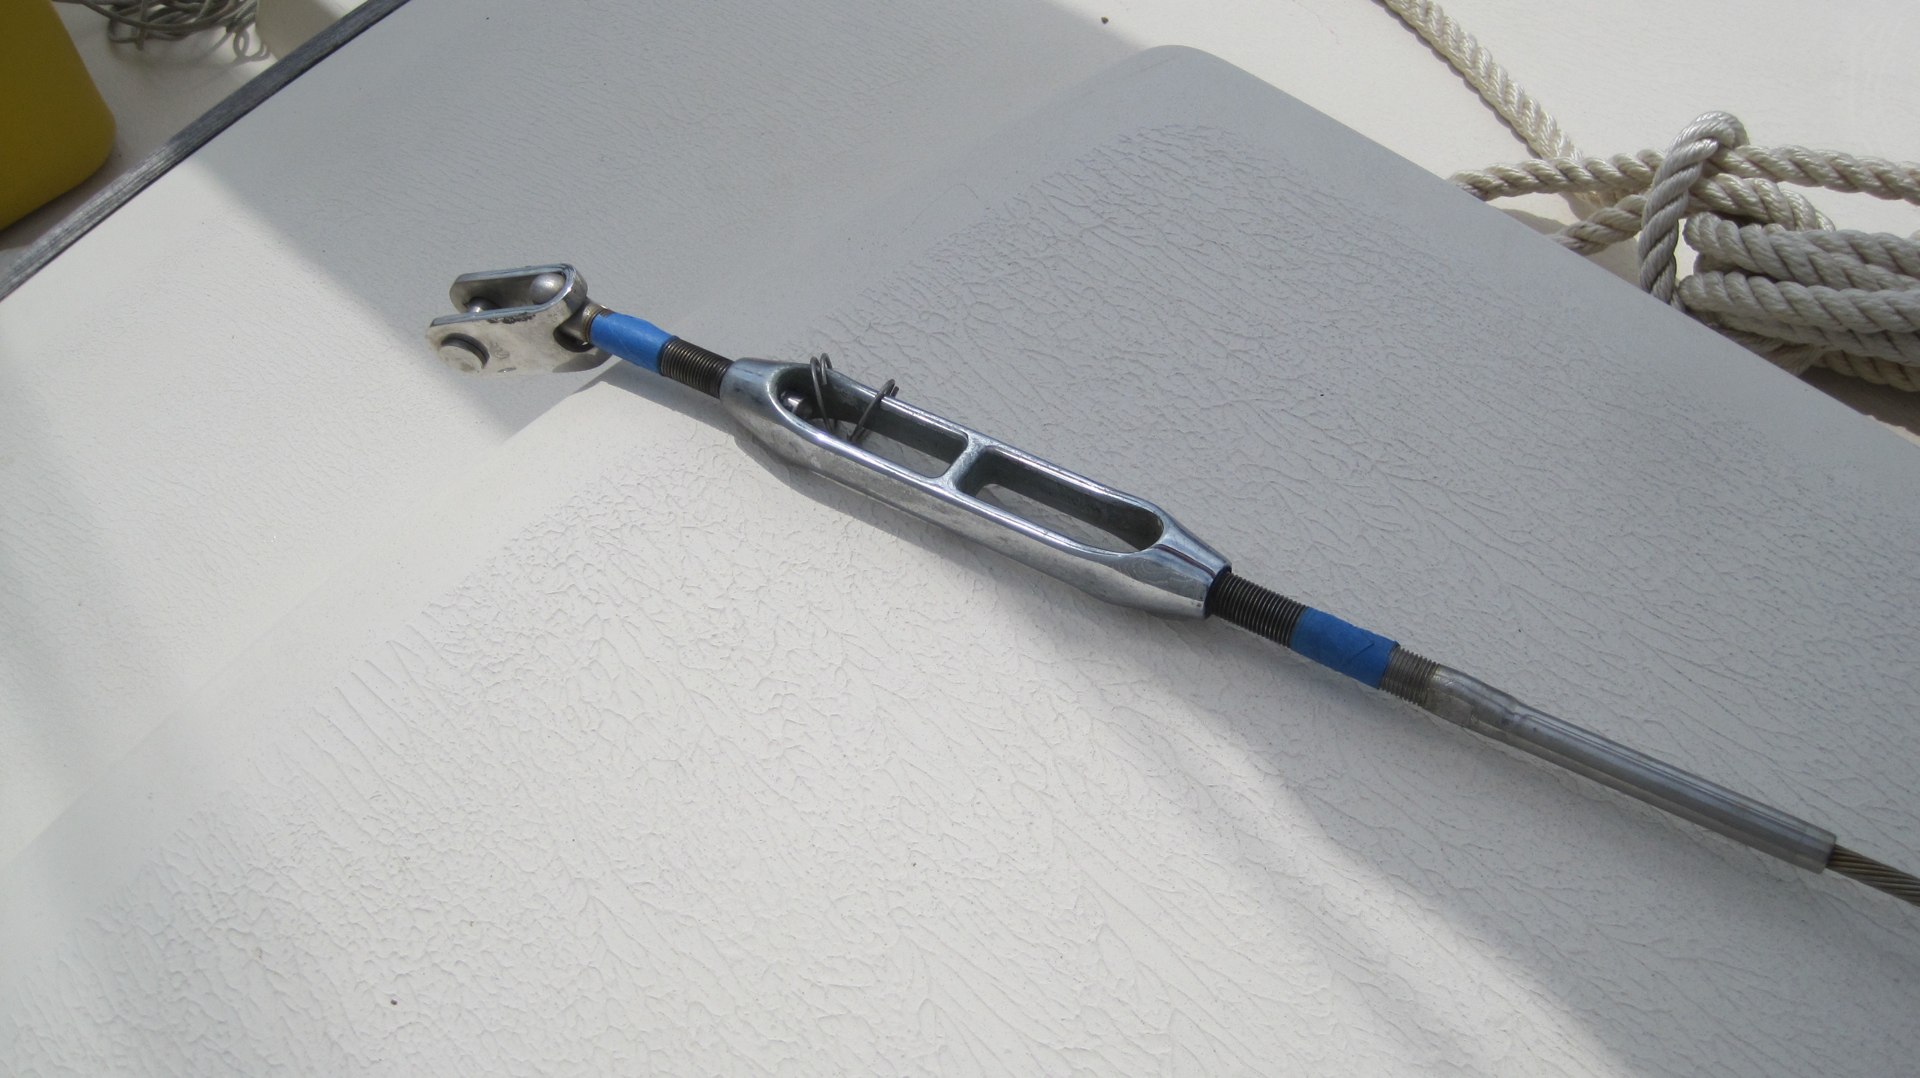
The first chainplate we tried was the starboard side backstay. We couldn't get the backstay slack enough to remove the clevis pin.
In order to unpin the backstay, we need to slack the forestay to ease the mast aft a bit. Once the mast is eased back, then we should see some slack in the backstay. Our headsails use Harken Cruising Unit 1 furling drums, which conceal the turnbuckles.

Therefore, the procedure goes like this:
-
Drop the sail to get access to the torque tube.
-
Mark the foil at the top of the torque tube so we know where it's supposed to be when we reassemble it.
-
Loosen top torque tube screws; the foil will slide down. Have someone hold it so it doesn't do any damage when it slips. Since the forestay is at the end of the bowsprit, keep a tight grip on tools and screws at all times. A bucket helps.
-
Remove the "crosspin" from the bottom of the drum. The furling assembly slides the foil to expose the turnbuckle. Put the halyard on the drum to keep everything up high. Put a pair of Vice Grips gently on the forestay wire to hold the foil up so you get get a wrench on the terminal.
Once we have the turnbuckle exposed, can do the following additional steps, still preparatory to easing the backstay.
-
Mark the forestay turnbuckle. We used blue tape.
-
Pull the cotter pins.
-
Ease the forestay turnbuckle. South Bay Rigging suggests that only the for'rd-most stay matters; the inner stay isn't under quite so much tension; the inner stay doesn't oppose the backstays.
Now we're closer to doing the real work. We're not there yet, but we're close.
-
Put a halyard to the toe rail near the chainplate and tension this halyard seems needless. We did it, but it doesn't seem to carry much of the load.
-
Mark the backstay turnbuckles. Both of them.
-
Ease the backstay turnbuckles until the whole thing goes slack. Both have to be eased. Easing just one doesn't do it.
-
Then we can unpin backstay which was what we started out trying to do.

Now, we can hammer the chainplates up out of the sealant on the deck. Inspecting them is primary.
On these two (out of sixteen) we only saw faint discoloration from rust. Nothing serious.
We also scanned them to get a precise set of measurements. And put them back where we found them.
Since they're too big for our 11" scanner, we had to scan them in pieces and assemble a final image using the Hugin application. I'm not thrilled with the idea that Hugin may have fudged ever so slightly. I gave it pretty precise alignment points, but...
So CA also traced. And I also measured. It turns out that the backstays seem to have pretty simple measurements.
¼" thick
1 ½" wide
14 ½" - 14 ⅝" long
Top-most hole is ½" dia, 7/16" from top edge.
Five screw holes are 7/16" dia.
-
approximately centered: ¾" from edge
-
almost exactly 2" from each other
-
starting almost exactly 1" from bottom
The new sealant? Found this on the C34 web site. Pretty clearly stated: Polysulfide. Life Caulk not Life Seal.
The proper bedding material for chain plates is polysulfide.
Boatlife Life Caulk or 3M 101 are two readily available examples.
The prime benefits of polysulfide are its sealing properties,
flexibility when cured and that it is readily removed when it's
time to re-bed in the future.
The only down side to polysulfide is the time required for a
complete cure—up to 21 days in cold temperatures.
Polyurethane adhesive/sealants such as 3M 5200 should not be
used as their primary purpose is to adhere, not seal components.

Once the chainplates are back we can reverse the procedure.
-
Reset the backstays to their marked positions.
-
Remove the halyard on the toe rail.
-
Reset the forestay to its marked position.
-
Reassemble the furling drum.
-
Bend on the sail.
The good news is that these are the only stays that are quite so complex.
Clifton from South Bay Rigging said we were on the right track. But we're still newbies and need to go slowly on this before doing something dumb.
Chainplate Adventure II: Mizzen
There are two back-to-back chainplates for mizzen lower and mizzen upper.
[There's a separate chainplate for mizzen mid.]
The mizzen lower/mizzen upper pair are on either side of a knee in the aft cabin. It's almost like one chainplate is the backing plate for the other. So far, so good, right?
The Mizzen Lower chainplate appears to be fiberglassed into the knee. Inaccessibly glassed into the structure of the boat.
The mizzen upper came out without too much struggle. The mizzen lower didn't want to budge.
It's mashed into a sandwich, apparently, surrounded by a GRP plate, and some internal plywood. Suggestions included using the old "persuader" to knock it loose. How hard does one hit it?
This Week
Engine Hours: 0. Diesel Gallons: 0. Miles Run: 0.
Read Aloud. The Wise Man's Fear: The Kingkiller Chronicles. Book 2.
Travel
| Attribute | Value |
|---|---|
| Engine | 0. h |
| Diesel | 0. gal |
| Distance | 0. nm |

