

Are two heads better than one?
I've reached my limit on removing marine sanitation devices. There were two heads on Red Ranger, and I've removed them both. That's my personal limit. There's a world of pain in dealing with sanitary hose and (I hope) I'm past wrestling with it.
The shit-cano in the vented loop isn't the biggest problem. It's the struggle to work with the thick odor-free sanitary hose. Ugh. Just ugh. There are a lot of ways this can go wrong and I've got the bloody knuckles to prove it.
It was (I think) 8 years ago when I removed the aft head and we put in a Nature's Head composting toilet. No plumbing. Very simple. Yes, you have to empty it periodically. It's about as awkward as a pump-out. But without the plumbing, and no need to drive to the pump-out dock.
See "The Aging Marine Sanitation Device" for the state of the forward head. It wouldn't flush. It was a nice antique, but, too much work to maintain.
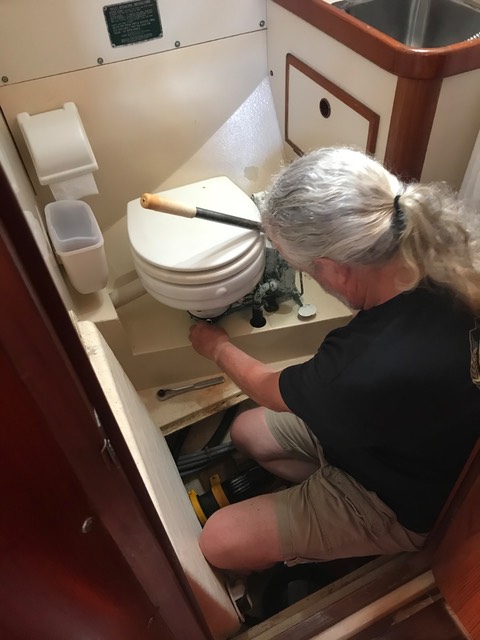
Here I am partway under the forward head, feet in the bilge, getting ready to remove the two hoses and four lag bolts.
It's a "simple" thing to connect. Two hoses:
-
Raw water comes in.
-
Septic water goes out to the holding tank, via a vented anti-siphon loop.
It sits on the floor, anchored by 4 ¼" bolts. Simple, right?
The problem (as noted earlier) is the septic hose to the vented anti-siphon loop. For any non-boaters who stumbled onto this by accident, we have to be cautious about multiple fittings below the water line. A broken connection could lead to a siphon, rapidly filling the bilge with water. So we run hoses up above the water line, past a "duck bill" (or joker) valve that will pop open instead of allowing a siphon to start, and from there back down to the below-the-waterline target.
The hose up to the anti-siphon loop can hold almost a half-gallon of septic water. Warning. don't disconnect it casually. the contents all run back down, creating a shit-cano.
(There's a one-way "joker" or check valve in the MSD to keep the waste in the hose.)
We don't use the forward head. We winterized it, so a fair amount of what's up the vented loop is anti-freeze.

The Vented Loop
I thought I had a brilliant plan for capturing the shit-cano. But the container I tried to wedge under the hose was an awkward size, and I still slopped a bunch of stinky water around.
CA did cleanup.
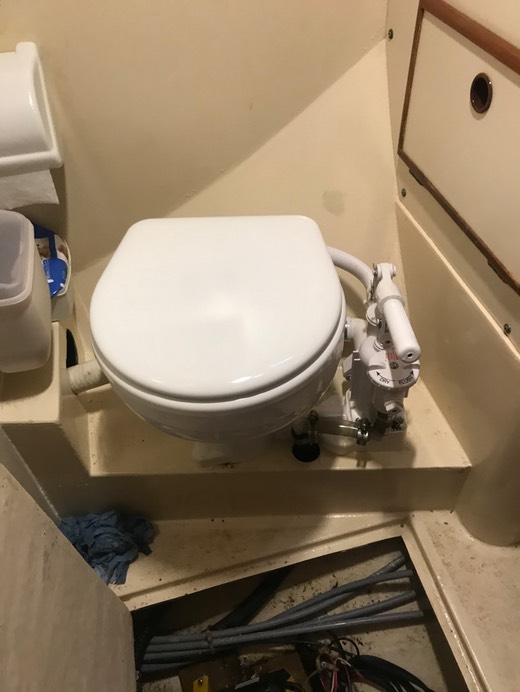
In this picture, you can see the septic drain hose. It goes into a space between the head and the hull. Quite an awkward set of turns and pinch-points for a stiff 1½″ sanitary hose.

MSD
The Raritan MSD, compared with the old Wilcox-Crittenden, weighs almost nothing. It has plastic parts instead of bronze. It won't last 37 years. It does, however, have rebuild kits available.
It seems to follow the original design. Indeed, the footprint is similar. Not identical — new holes were needed — but remarkably similar. There's a big pump with a valve.
The head works in two modes:
-
Flush: water goes in and waste goes out.
-
Dry: waste goes out.
I filled the old mounting holes with Marine-Tex and marked and drilled four new holes. This was hard for me because the damn bowl overhangs the base and you can't simply stuff a drill in there. Indeed, you can barely get a pencil in there. And I'm not good at drilling where I marked.
The supply water line is fun to work with. The hoses are flexible. The fittings just work. Sadly, the old location is nowhere near the new location. So there's some extra hose bits here and there.
The sanitary hose is it's own unique world of pain. It's stuff, thick, and incompatible with many hose barbs.
Absolutely incompatible. I found a note online that fittings nominally 1½″ can vary from 38 to 42mm. 38mm is nice. 42mm is brutal.
The Raritan fitting seems to be closer to 38mm. The hose glides on.
But.
But.
You have to dial the hose clamp down with more than your little hose-clamp screwdriver with the little ⁵⁄₁₆″ fitting. You have to break out a socket wrench to get that hose clamp to stop dripping. The sanitary hose is thick.
After fighting with this, I now have come to understand the only right thing to do is replace the hose from the vented loop down to the head. If you can positively identify the hose. Because of the twists and turns we could not figure out which side of the vented loop went to the head and which went to the holding tank.
Options
Of course, I didn't replace the hose. There were three cards in my hand:
-
Optimistic Card of Least Pain: use the existing hose. It had stretched over the previous head fitting, leaving it with an inside diameter a hair larger than 1½″. And. Bonus. I didn't know (when I tried this) to use a wrench on the hose clamp. I couldn't get it to stop dripping. Big Sigh here. Play the next card.
-
Contrived Card of Most Pain: cut the stretched ending off the old hose, put in a hose barb coupler, and put in a few inches of new hose. The hose-barb to hose compatibility issue is the crux of the problem. The coupler's barbs were (maybe) 40mm in diameter and Would. Not. Go. In. The. Hose. I'm sure it's fine for PVC or something stretchy and soft. I lubed it up with dish soap. I wrestled. I tried hot water. (I didn't try the heat gun.) I fought and cursed and bled. At some point it was clear it was neither going on nor coming off. So. I put on a hose clamp to make it official that it was stuck there.
-
Card of Nominal Pain. Replacing the hose would probably have involved only the requisite level of pain. I didn't try this. I put a wrench on the hose clamp where my horrible, 3-part old hose-to-coupling-to new hose attached to the new head. I cranked it down until it stopped dripping.
And then I cranked down some more on the hose clamp until the hose regretted ever dripping. Socket extenders are a wonderful thing.
Outcome
The new head appears to work.
Instead of a foot pedal this has a knob.
-
Turn to Flush, pump a little water in.
-
Do your business. Be careful to use minimal paper. (CA prefers to to #1 paper in the trash. #2 paper can get flushed.) The fresh-water shower is right there. Use it.
-
Flush and pump out. After the bowl is empty 6 more punps to push things up the vented loop stack.
-
Turn the knob to Dry and pump the last of the water out.
-
Pump completely dry.
We'd like to put about 4 pints of water into the vented loop to push things up and over the top where it can drain into the holding tank. We don't want too much flush water in the holding tank.
I measure the pump body as 2¾″ outside diameter, 5″ tall. Assuming schedule 80 PVC, it seems likely to be a 2¼″×4½″ cylinder. I get 17 cu in on each stroke. The vented loop is about 104 cu in. So. 6 pumps (3 up, 3 down) should do it. Then you have to pump the last of the water out of the bowl.
Attaching the septic line was painful, but necessary work. A little more cleanup and we can move on to more interesting things. Oil Change. Engine Commissioning. Travel things.
And then planing the Memorial Day cruise to Drum Point and possibly Cambridge. Stand by.