

We're (still) moored on ball K-9 (at 24°42.250′N 081°05.550′W) in Boot Key Harbor.
Beth Leonard (I think) said "Cruising is fixing your boat in exotic places."
For the last three days I've been going aloft to work on our OGM LXTA masthead light. It has both the sailing tri-color and the white all-around used for anchoring.

I didn't bring a camera up to the top of the mast to take sexy pictures of the installation or the anchorage. I'm too worried about dropping it. There's no easy lanyard attachment. Maybe I'll bring the GoPro up there to take a few pictures.
Instead of cool pictures, here's how we do the work aloft.
We have steps in the mainmast. We use a Mast Mate "Step Ladder" for the mizzen mast. This means no hoisting with a winch.
Equipment
First. And most important. Spinlock Mast Pro harness. This is a rock-climbing harness with a few extra features.

While some folks like a bosun's chair, we've done a fair amount of rock climbing and really, really like the security of a rock climbing harness.
Second. Super helpful. Mastmate Workbelt. This goes over the harness. The pouch holds tools and parts. Most important, it has a belt that goes around the mast to keep you in place, so you have both hands free to work.

Also helpful. Climbing Shoes.

Barefoot can be a problem. Flip-flops will be a problem. Sneakers and running shoes are often bulky.
These are uncomfortable, but very grippy. They slip into the mast steps nicely.
If we had to climb, these provide needed traction for working up a mast using the workbelt.
Plan Your Climb, Climb Your Plan
This is the same rule used for SCUBA. Even a casual dive to stare at coral requires a plan. Ascending the mast requires a "Here's what I'll be doing" explanation. We call this the "happy path." And it also requires some "if that doesn't work, here's the alternative," when we step off the happy path.
For the OGM replacement, the first ascent involved a notional plan of what I thought I could do to remove the old device. If this didn't work out, the alternative was to remove the entire bracket. And. Of course, there's the final alternative, "otherwise, I'll ask you to lower me and we'll talk."
The second ascent was to replace the wiring. The alternative was to replace as much as I could and some down for a rest and a swallow of water. As it was, undoing the old heat shrink took a long time, and I only reconnected one of the three wires.
The third ascent connected the other two wires and included a test. Nothing more. This actually went according to the happy path plan, no alternatives were exercised. It was fun to go up, execute, and come down.
The fourth ascent cleaned things up. The self-sealing silicone tape, cable ties. All that. It didn't actually replace the device, though. It's right awkward to unscrew the OGM from the bracket.
Next ascent up will be to remove the bracket and the device. The screws for the bracket are more accessible than the screws under the light. I can bring it down, swap lights, and then climb back to reattach it.
Techniques
Because we have steps on the mast, ascending it is exactly like rock climbing.
One person climbs. One person is on belay.
We use the spinnaker halyard as our belay line. We tie a "Figure Eight Follow-Through" or "Trace Eight" as a hitch to the climbing harness. No bowline. No double-bowline.
The shackle at the end of our halyard is never something to trust your life to. After the "Figure Eight Follow-Through" is tied (and checked by climber and belayer), we clip the shackle out of the way to keep it from flopping around.
The folks at one rock gym had a little 1-2-3 that they recited. 1. One line up, 2. Two lines through the figure 8 knot, 3. A third tuck into the figure 8, called the "Yosemite Finish".
Not everyone likes the Yosemite finish. We find that working with the big shackle, it's easier to do this than tie the fisherman's knot (also called a barrel knot) as a finish.
After the knot inspection, we make sure all is well.
"On Belay?" the climber asks.
"Belay is on," the belayer replies.
"Climbing?" the climber asks.
"Climb on," the belayer replies.
There's no room for informality or chit-chat here. We recite the words to make sure nothing else is going on. It brings a much-needed focus.
The climber's commands can be "Take up slack", "Cleat here", "Cast of the cleat", Climbing", and "Lowering." That's about it.
If the plan includes some other steps, then, there may be a few more commands. For the third ascent, that was "Run the test." Even this was planned out. Tri-color for 5 seconds. Anchor for 5 seconds. Both (to exercise the strobe feature) for 5 seconds.
No chit-chat. Belayer cleats the climber off, executes the test, and go back to monitoring the belay.
And when it worked, the joyful clapping is followed by "Cast of the cleat", and "Lowering."
Summary
Here's the failure. You can the brown wire (for the all-around anchor light) broke. The heatshrink connectors all look good.
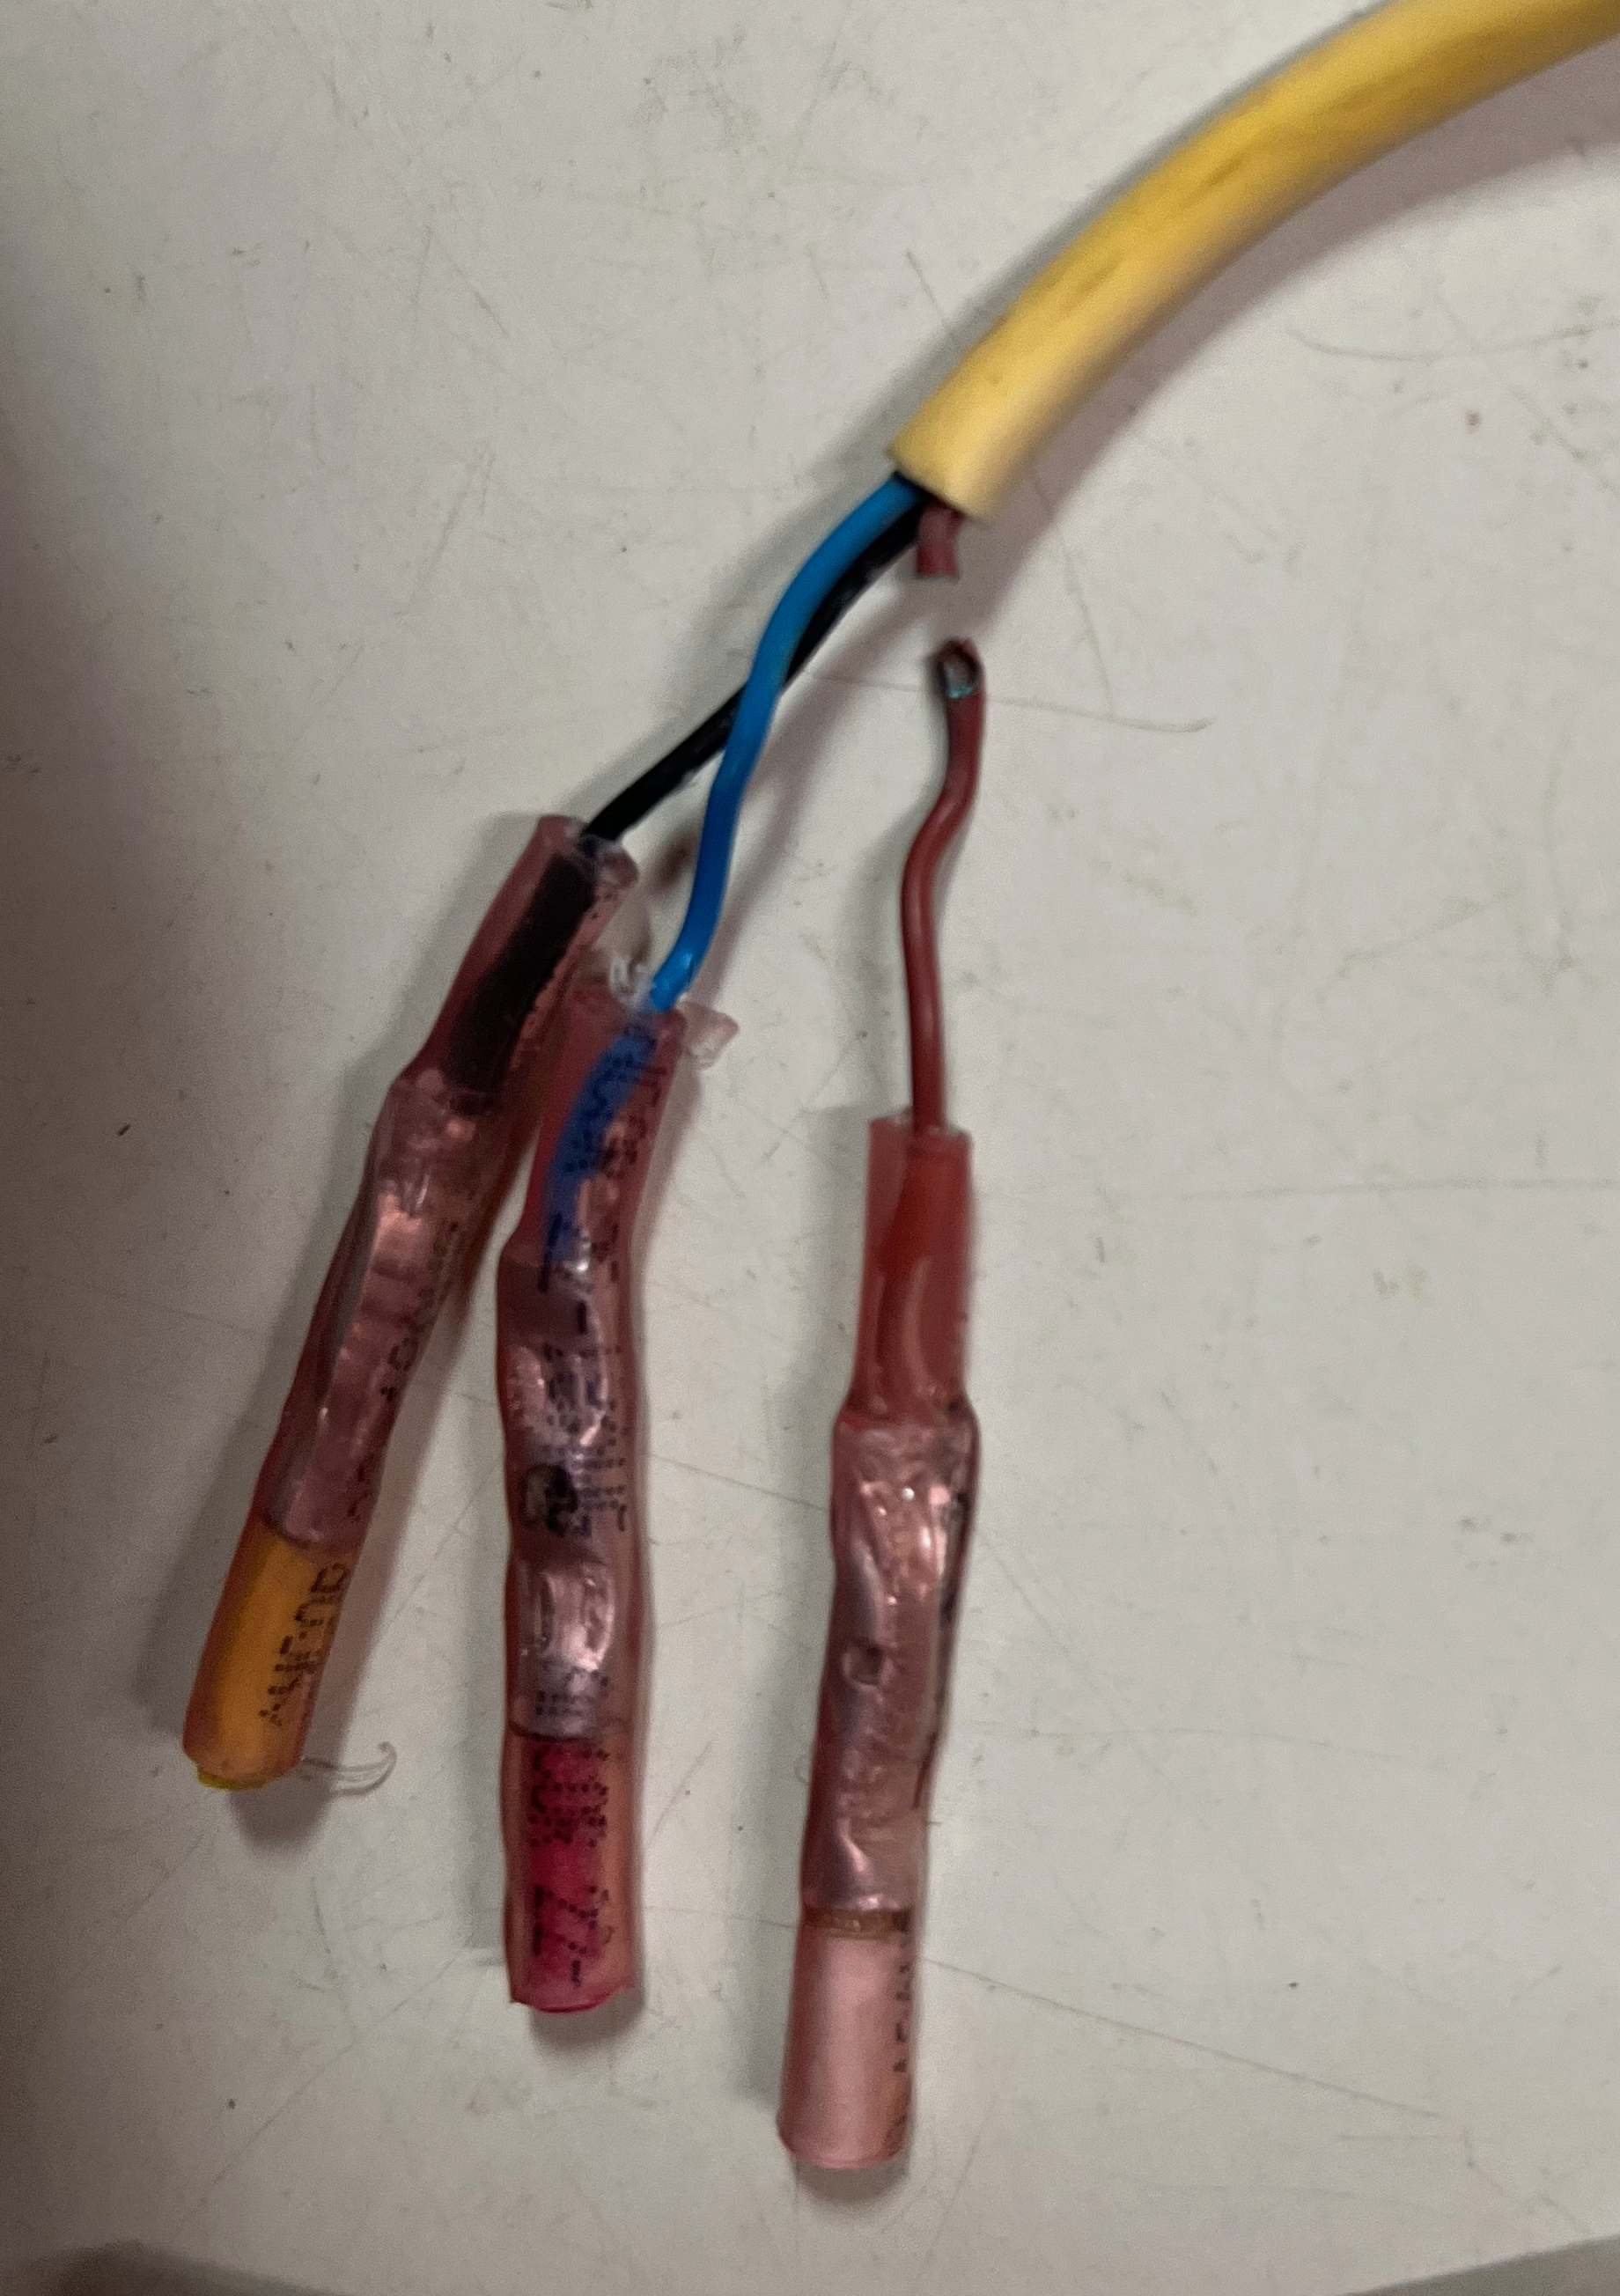
This bundle was wrapped in a larger heat-shrink sleeve that didn't go all the way to the yellow, outer insulation. There were less then 5mm (3/16″) showing. One of those little bits of exposed 20 gauge wire finally broke.
There's a bit more to do to replace the device up there. But not today. I have a working device with working wiring. I'd like to put up the replacement device, and save the old one as a spare. To do that, I need to buy the official bracket. The screws between the device and the bracket are frozen. The bracket does comes off the mast.